Public API
The public API enables to directly interact with data produced by DC Netscope : it is designed to securely enable scripts to fetch data. In this section we explain :
- how to use the documentation of the public API.
- how to create security tokens that will authorize scripts to interact with the API,
- how to write a python script that use the API.
Warning
We are currently rewriting our public API. The existing version is deprecated, and we’re developing a simpler, more streamlined v2. If you notice any missing endpoints or have specific needs, please don’t hesitate to contact us : your feedback will help shape the new API.
Documentation of the Public API (Swagger)
The documentation of the public API is available directly on the DC Netscope appliance. To access it, go to the
administration page, and click on the Public API item in the top menu :

You should land on a webpage that list the endpoints that are available with the current version of DC Netscope. It should look as follows :

We can see that the webpage describes each available endpoints. For example, it is possible to see how we can get the list of available timestamps that can be used to query data in DC Netscope :

The response of the endpoint is detailed in the end of the endpoint's card : it shows the response code and the output type and an example when it is available :


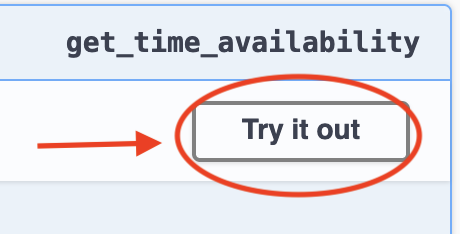
You can try the API by clicking on the Try it out button :
The parameters input fields should now be editable. Once you have entered the values you expected, you may
click on the execute button. A spinner will appears, confirming that the API have been requested.

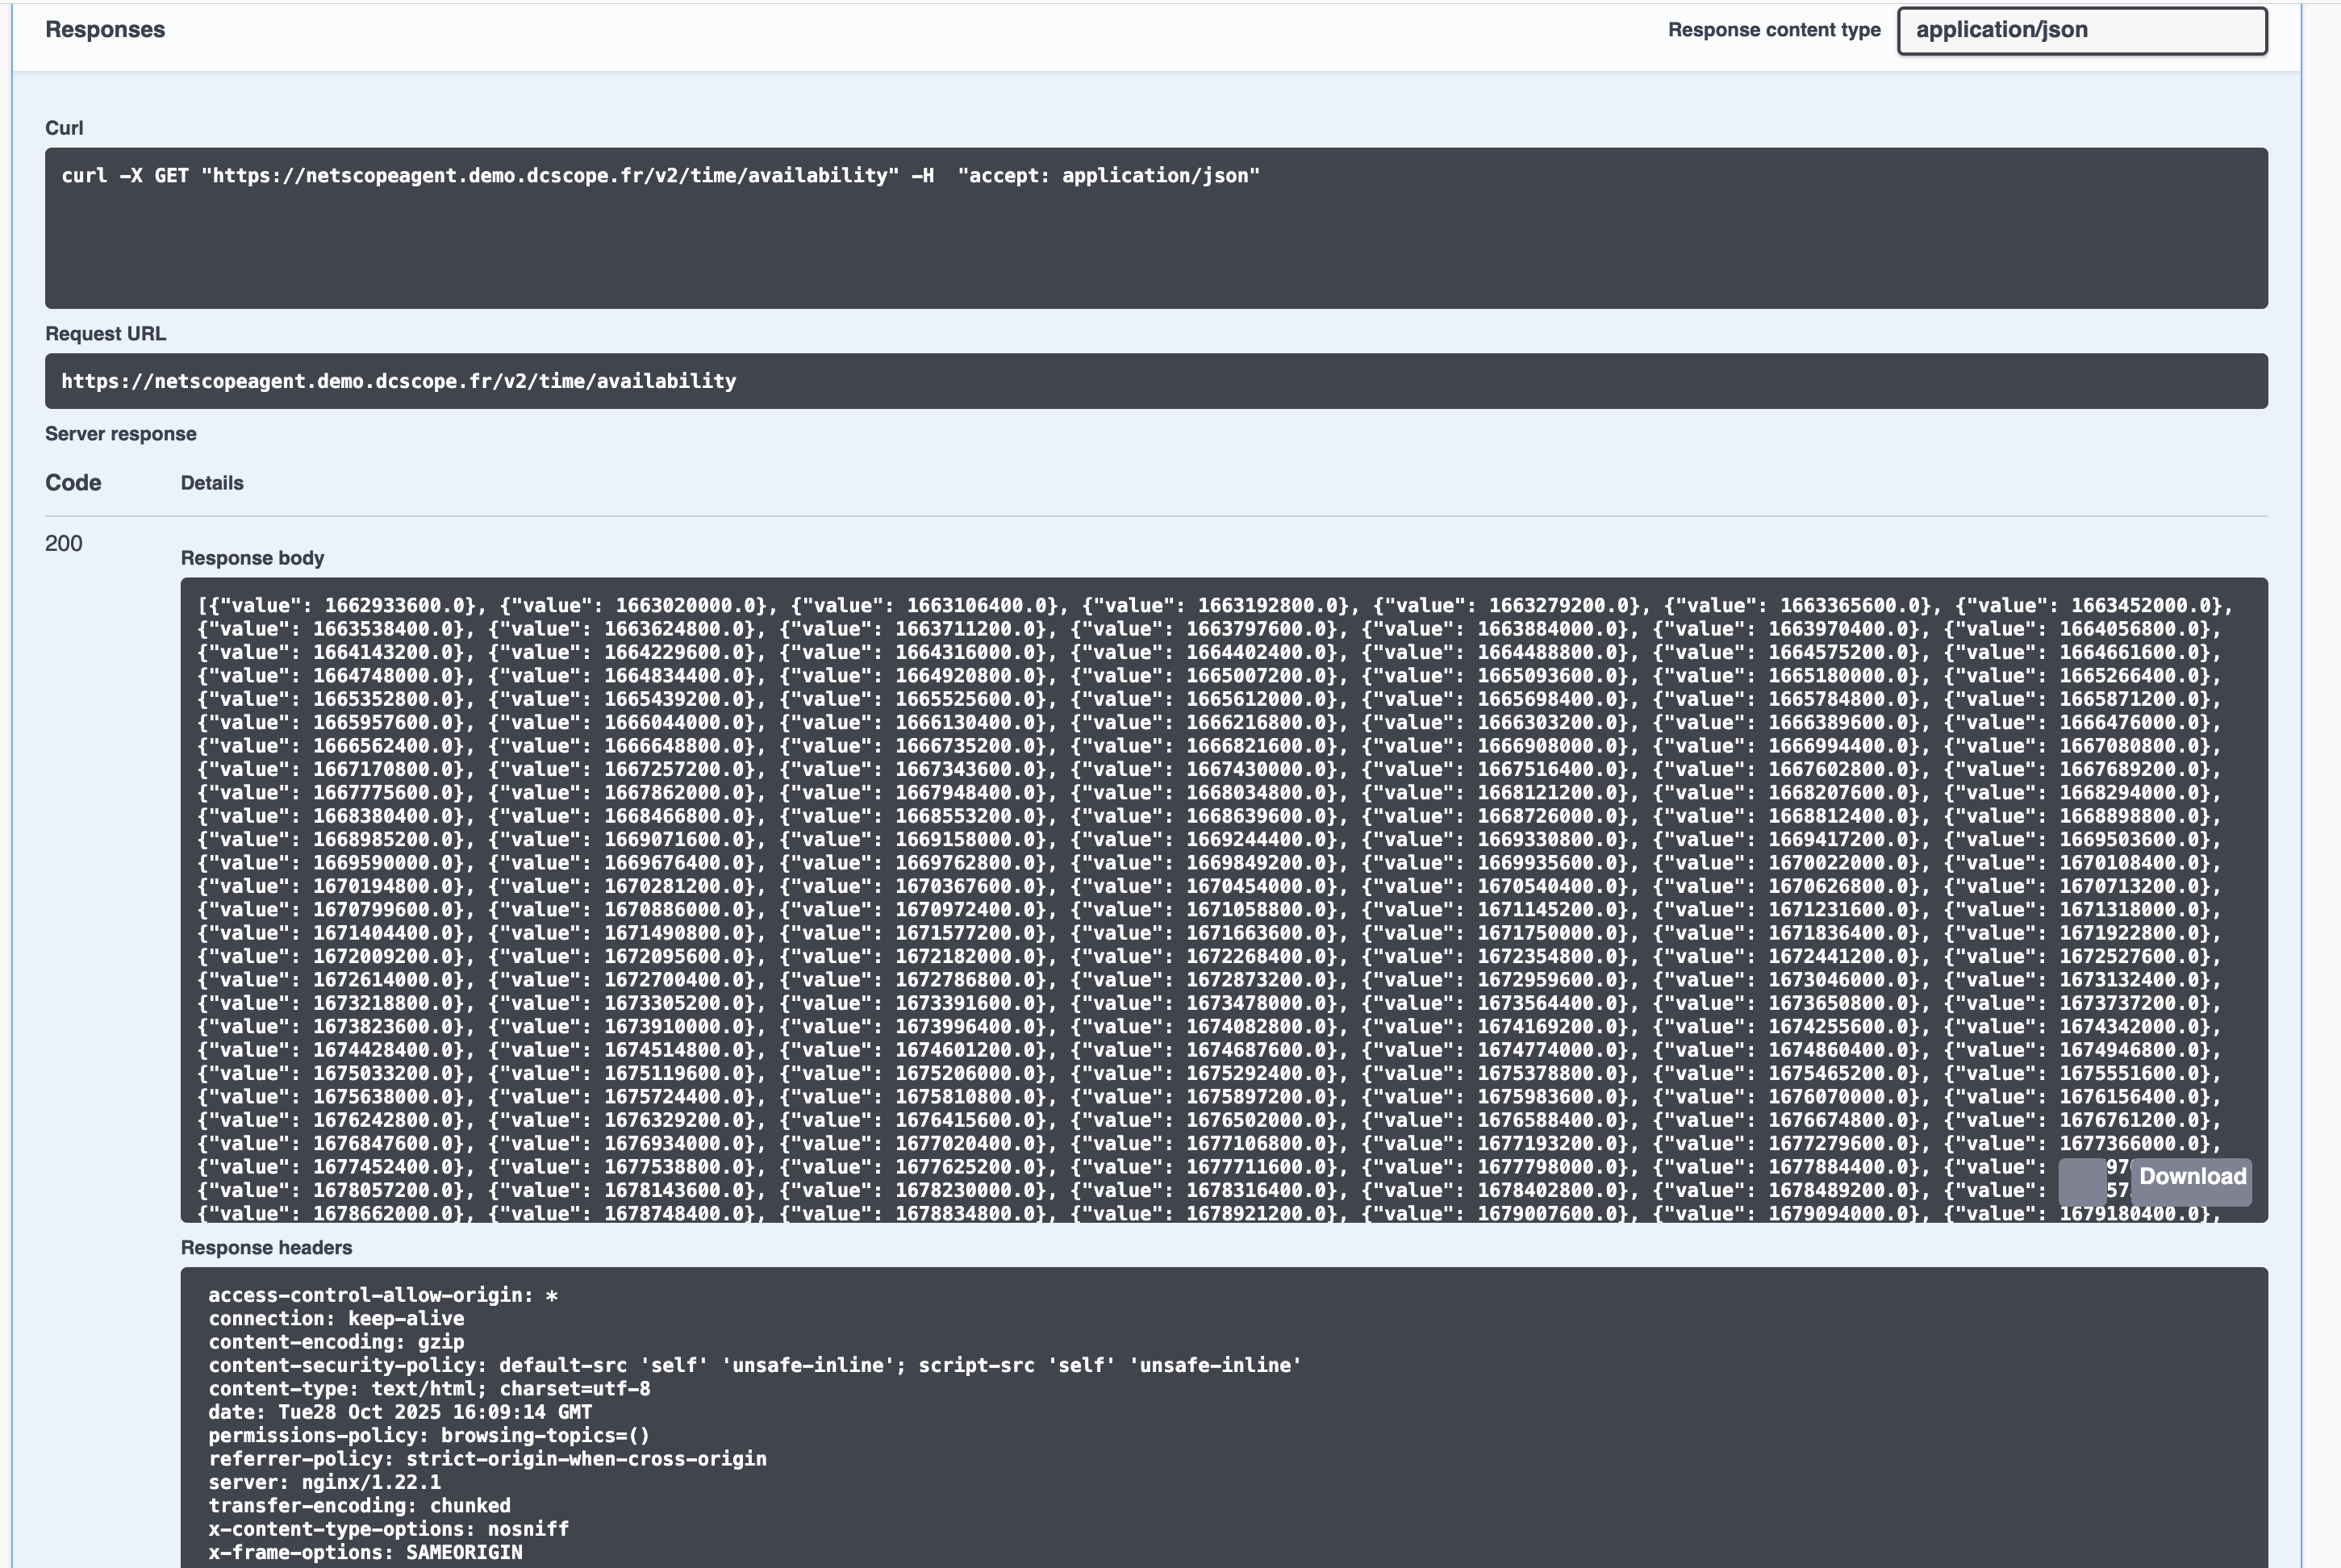
Once the response has been received, details appears in the endpoint's card :
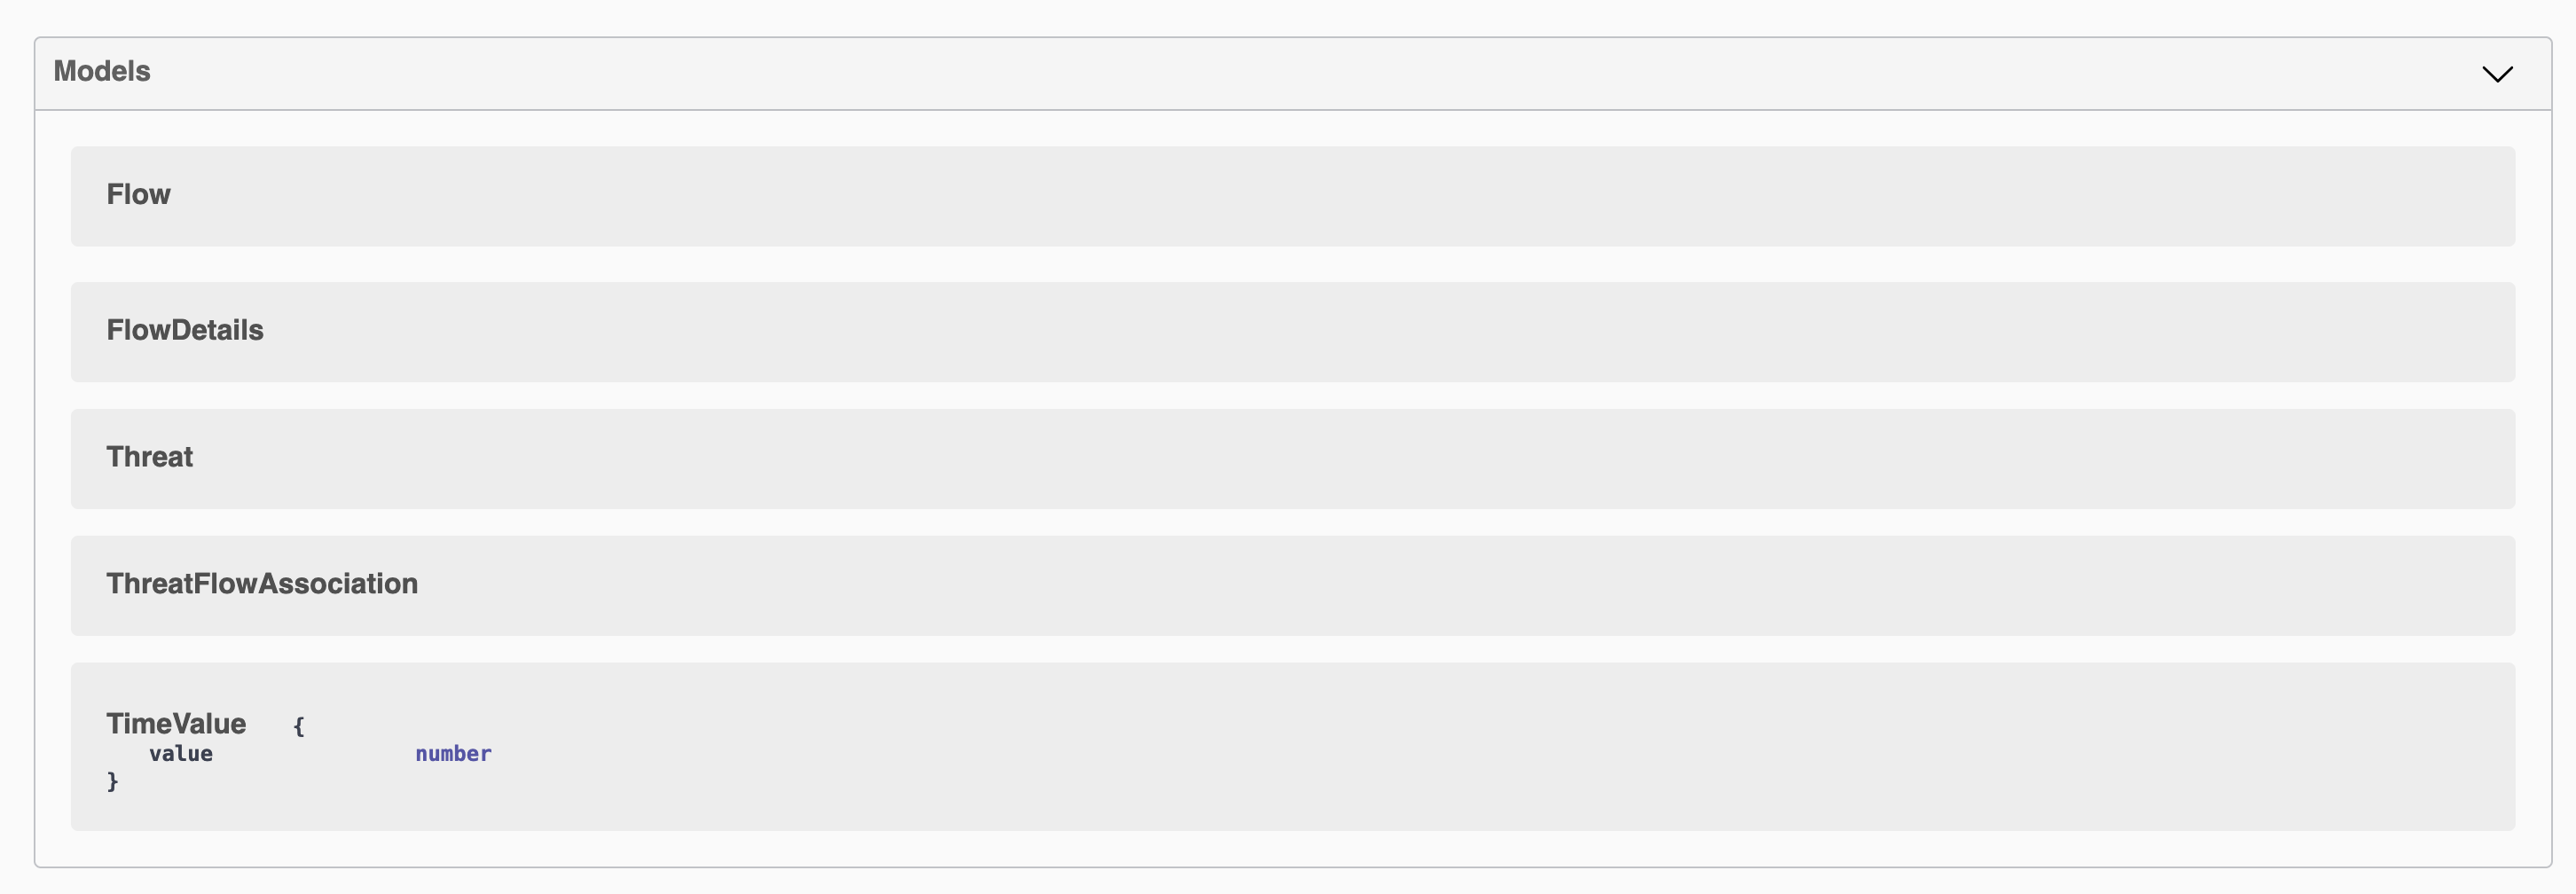
Finally, the webpage also lists the types that are returned by the endpoints, with a description of each field of the type :
Authorization to the public API
First go to the User Management section available in the administration page :

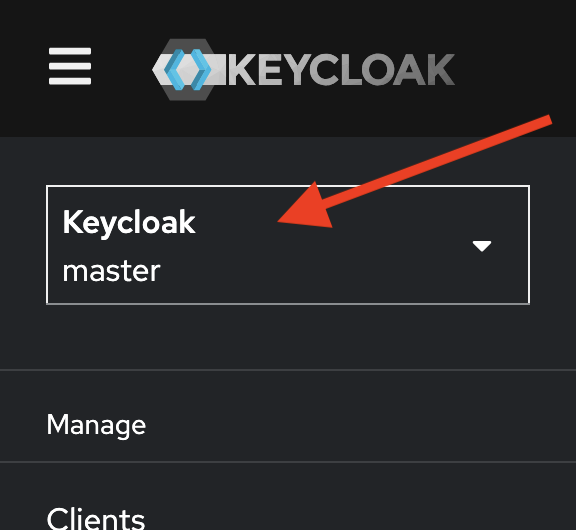
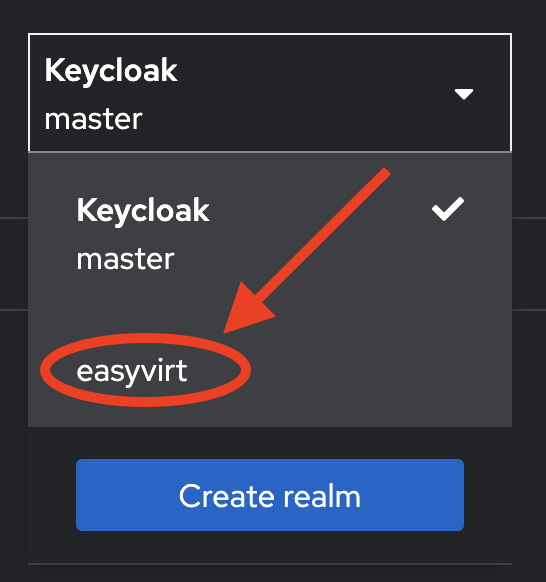
Then switch to the easyvirt realm, click on the realm selection at the top-left corner of the web page :
Then select easyvirt to change the current realm :
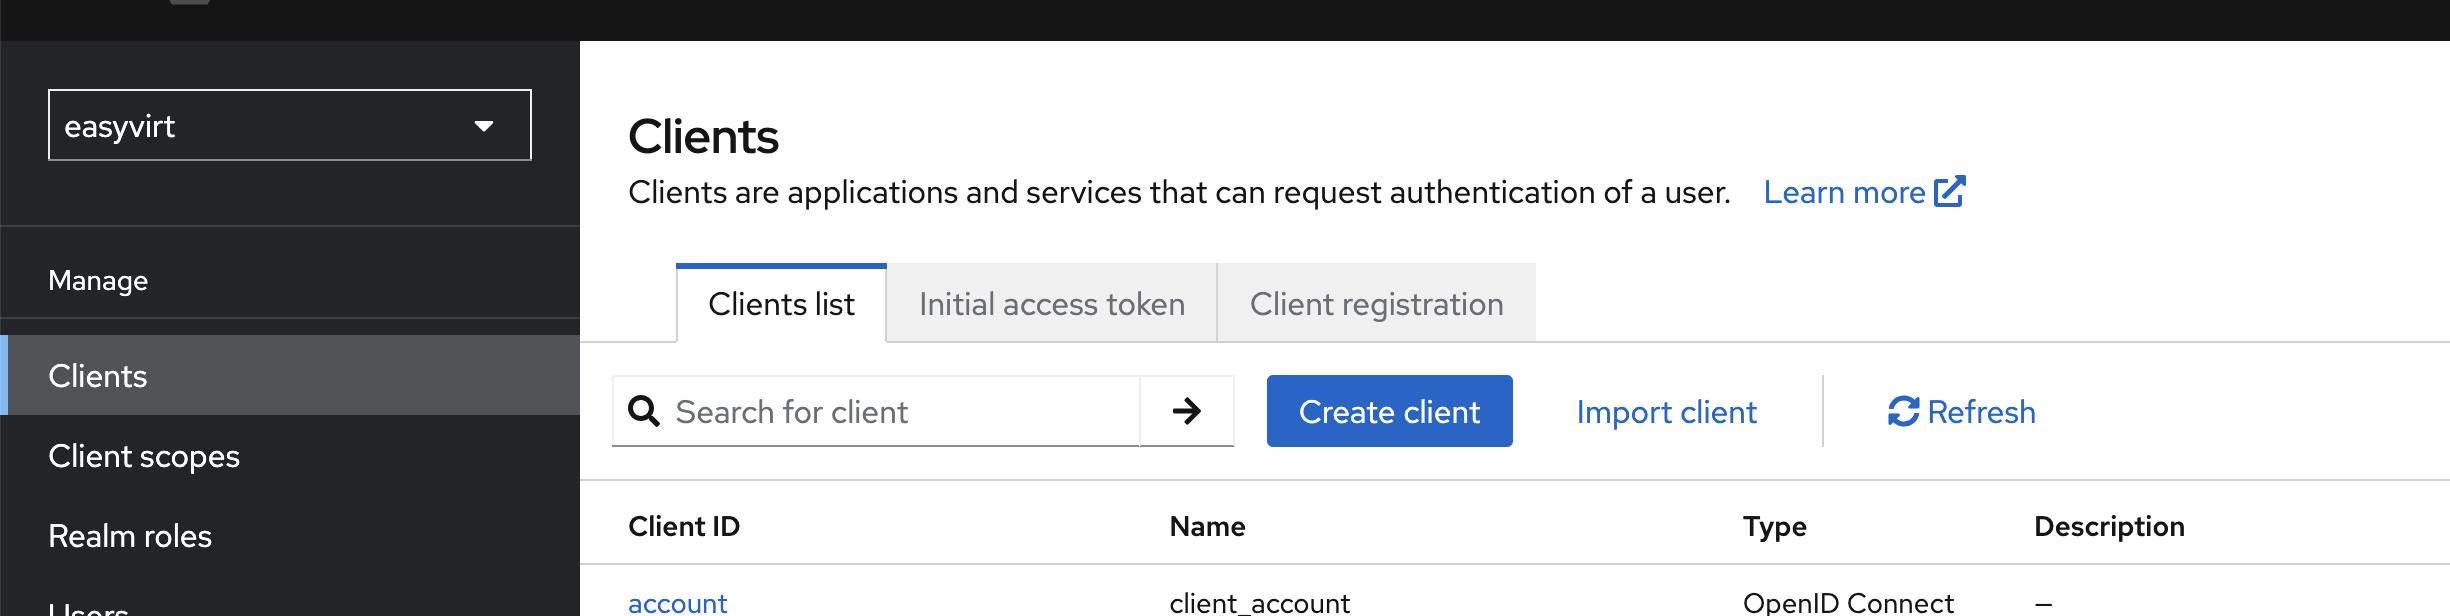
You should now be on the management section of the easyvirt realm (more details here).
Now, go to the Client section and create client dedicated to the API by clicking on the Create Client button :
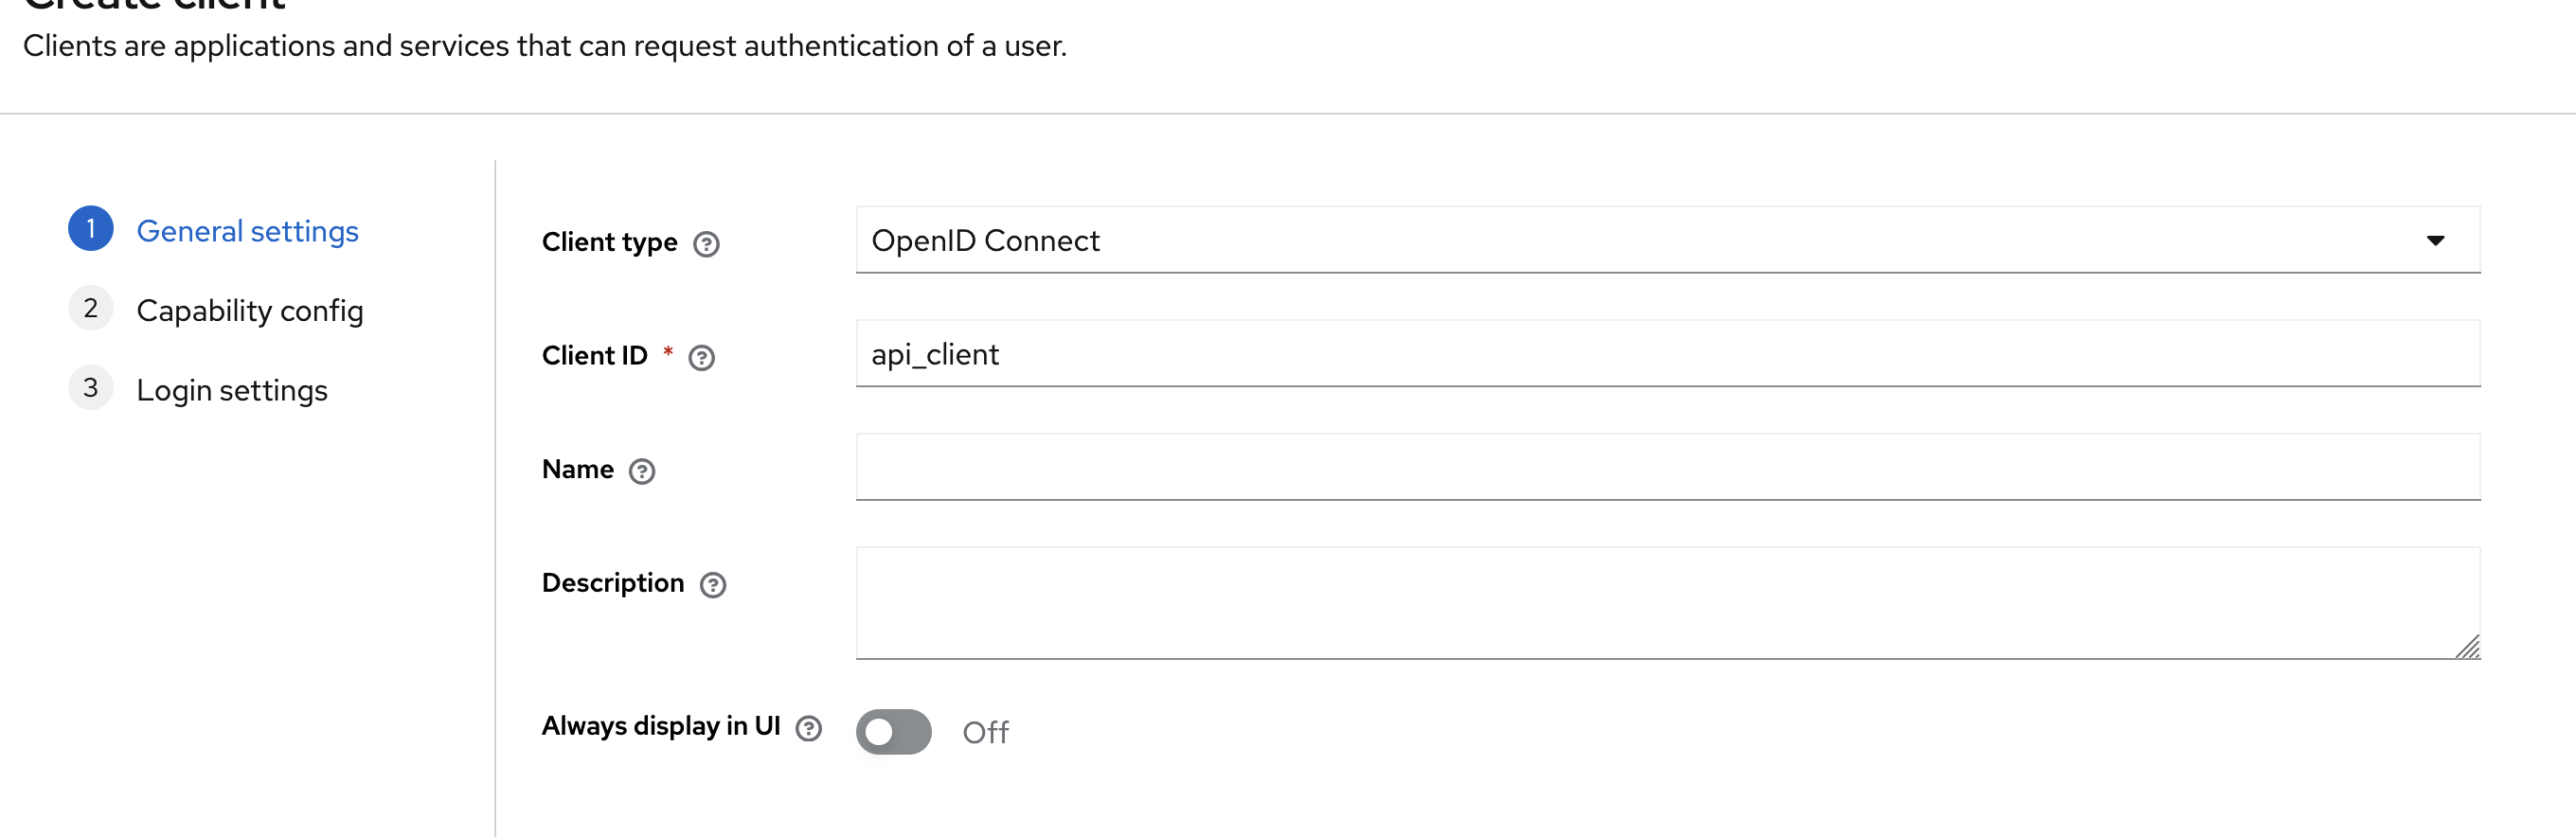
Specify a name to the client. In the rest of the documentation, we will use api_client as the name of the client :
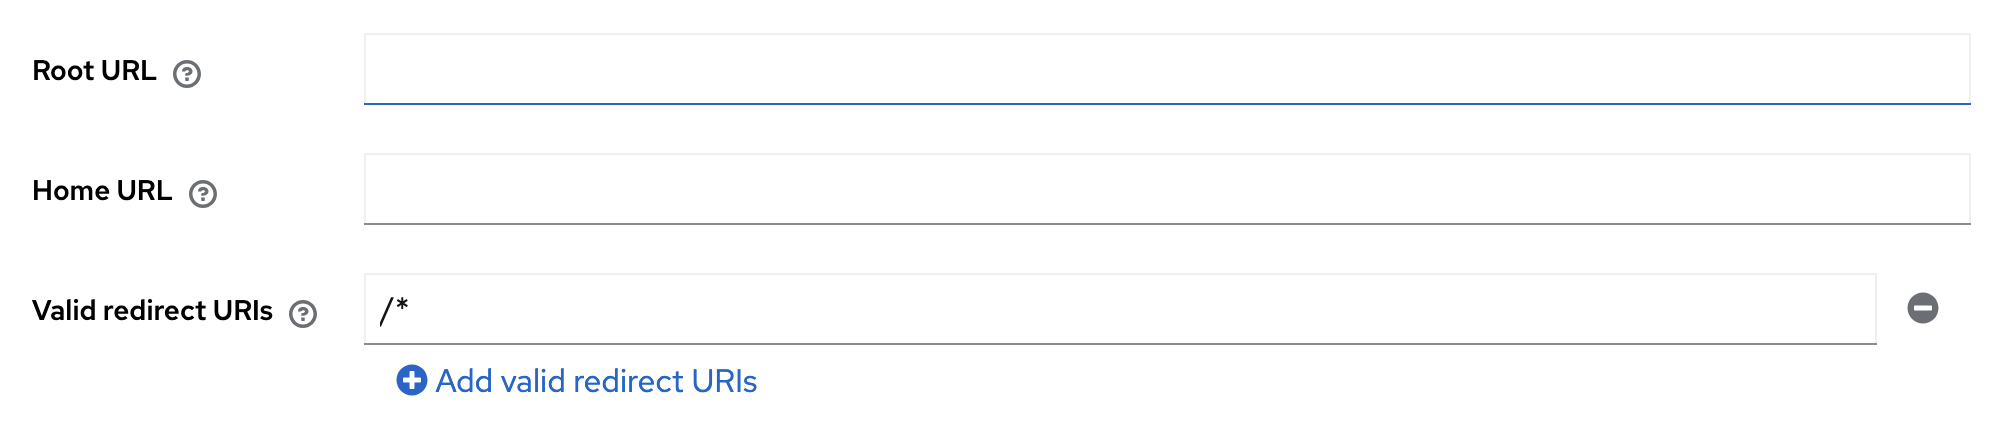
In the settings of the client, specify /* as authorized redirect_url as in the following screenshot. In you are
using a domain name, that your domain name here (for example https://mydomain/*).
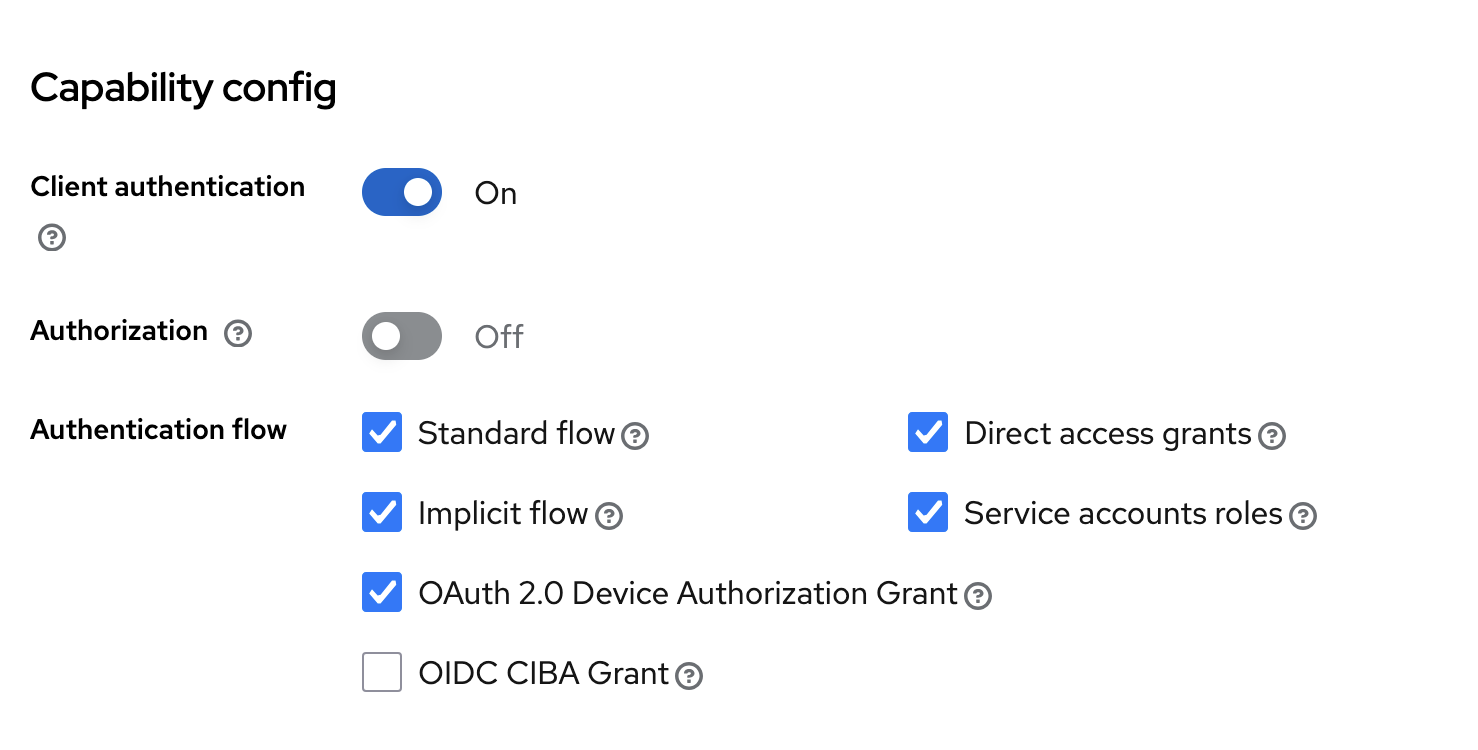
Configure the authentication settings of the api client :
Once everything is configured, you can the details of the authentication parameters in the Credentials tab :

For the next section, you will need client name and the client secret.
Writing a python script that interact with the API
Once you have access to the public API documentation, and that you have created a client and a token to get authorized access to DC Netscope, you may write a script that interact with the API. Below is an example of script in python.
To use this script, first ensure that python and python-pip are installed in your compute. On Debian, you may run the following commands :
apt update
apt install python3 python3-pip
Then install the dependencies of the script :
pip3 install requests
Warning
On recent versions of debian, you may have to run pip3 install requests --break-package-system or create a dedicated virtual environment.
In the following example, we will create a new authentication token, and show how to use it to get an authorized access
to the public API. We will call the /v2/time/availability API endpoint, letting default parameters to get all the
timestamps (aggregated by day). At the end we show the API response and its http code.
In the following example, change the DCNETSCOPE_IP_ADDRESS and CLIENT_SECRET value to match what is in your
infrastructure.
import sys
import requests


def _main():
    print("I will showcase how to use the public API")

    # Step1 : Variables that contains information about the client and how to connect to the authentication system
    DCNETSCOPE_IP = "DCNETSCOPE_IP_ADDRESS"
    KEYCLOAK_URL = f"https://{DCNETSCOPE_IP}/keycloak"
    CLIENT_ID = "api_client"
    CLIENT_SECRET = "CLIENT_SECRET"

    # Step2 : Prepare authentication
    token_url = f"{KEYCLOAK_URL}/realms/easyvirt/protocol/openid-connect/token"

    data = {
        "grant_type": "client_credentials",
        "client_id": CLIENT_ID,
        "client_secret": CLIENT_SECRET
    }

    # Step3: Generate an access token
    resp = requests.post(token_url, data=data, verify=False)
    resp.raise_for_status()
    resp_json = resp.json()
    token = resp_json["access_token"]

    # Step4: Create and headers dict that will be passed to the HTTP requests
    headers = {"Authorization": f"Bearer {token}"}

    # Step5: Call the URL that provides timeranges
    url = f"https://{DCNETSCOPE_IP}/v2/time/availability"
    api_resp = requests.get(url, headers=headers, verify=False)
    print(api_resp.status_code)
    print(api_resp.content.decode("utf-8"))


if __name__ == "__main__":
    _main()
    sys.exit(0)